
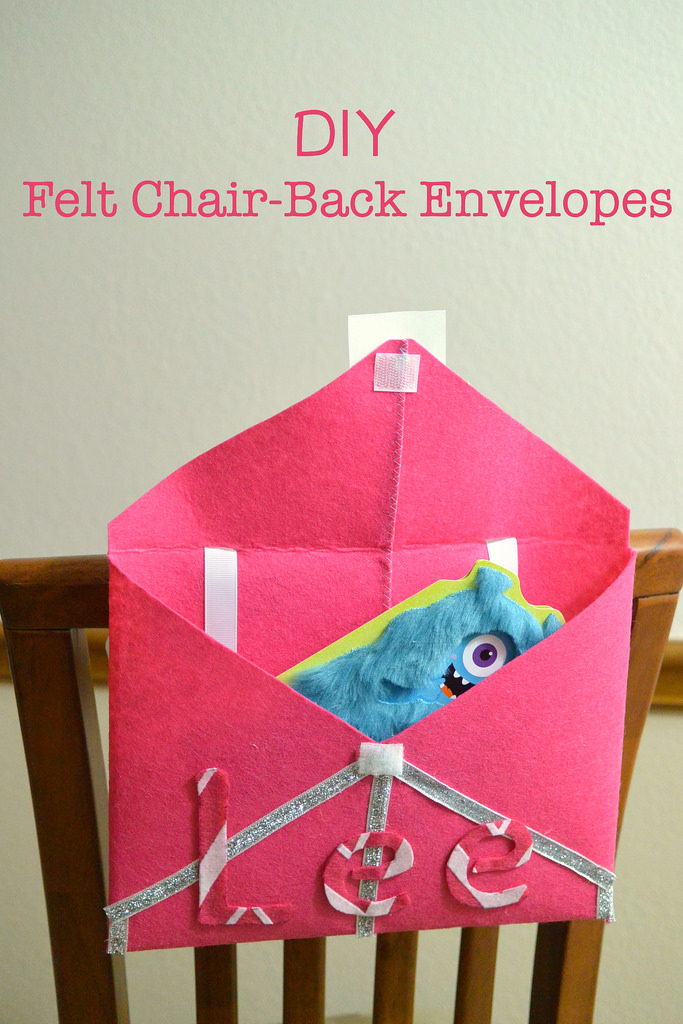
Last year Family Fun magazine had a basic tutorial for making these chair-back envelopes for special deliveries leading up to Valentine’s Day. I thought they were so cute and thought I would make one and share it with you on the blog.
I was talking to a friend about them and she told me that Pottery Barn sold them a few years ago (shows you how long I’ve been out of the loop on things like this since my daughter is older!). I did a Google search and sure enough these adorable yearly decorations are Pottery Barn loveliness, but also pretty costly. This one I made cost less than $5.00 and you can create them together with your kids, making even more memories for the holidays.
Ends up the one I made was a bit more work than I had anticipated. The instructions in the Family Fun magazine left out an important detail, like the amount of felt you would need… 😉 And so I found myself altering the pattern and embellishments more than I had first planned. So I have some tips & tricks added to my outline here, for some alternate ways you can save yourself some stress, and make them completely no-sew if you like.
DIY Felt Valentine’s Chair Back Envelopes
Materials
Pattern from Family Fun Magazine
14″ x 19″ Piece of Felt (or a combination of two large felt pieces that make approximately that size)
Coordinating colored felt, 1 to 2 8.5 x 11″ sheets depending on name length
Letter Stencils
Fabric Glue
Small velcro closure piece
2 yards of Ribbon
Embellishments such as ribbon, stickers, gems, etc.
Instructions
Print and assemble the envelope template located on Parents.com. (I needed to cut mine down to fit the two large pieces of felt that I purchased for this project prior to cutting out and measuring the template).

Cut the shape from felt as directed on the template. IF you are using two pieces of felt like I did, you will cut it with both pieces on top of each other and then sew them together with a zigzagged seam to make it one piece. If you want to avoid sewing and altering the template…buy a large piece of felt from a bolt in the fabric section 🙂
Fold in both sides so that the points meet. Fold in the bottom and top flaps to make an envelope, and then iron the folds in place.

Cut two slits along the top fold and then about four inches below cut another two slits on the back of the envelope, cut your ribbon into two 1 yard lengths and thread them through the slits so the ends are on the outside of the envelope.

Tack the two side flaps together at the center with a dot of fabric glue.

Then run the glue along the two edges of the bottom flap and fold it back in place to adhere to the side ones. Let dry.
I primarily put the glitter ribbon on it to hide the sewn seam and glued edges, but thought that would be fun for kids to add, to make the envelopes uniquely their own.

Attach one side of your velcro to the bottom side point of the top flap and the other to where it will meet the center of the envelope.

Using letter stencils, cut out the letters of your child’s name from the co-ordinating felt. Embellish the envelope with gems, stickers or hearts cut out from additional felt and the name to complete it.
Tie it to the back of a chair, and fill it with goodies leading up to Valentine’s Day!


 Tammy Litke is a Dallas blogger, blogging since 2008. She loves to watch movies, play video games, spend time in the kitchen, and travel. Between recipes and reviews you’ll find many helpful and some just plain funny posts on her blog. Welcome, pull up a chair and stay for a while!