

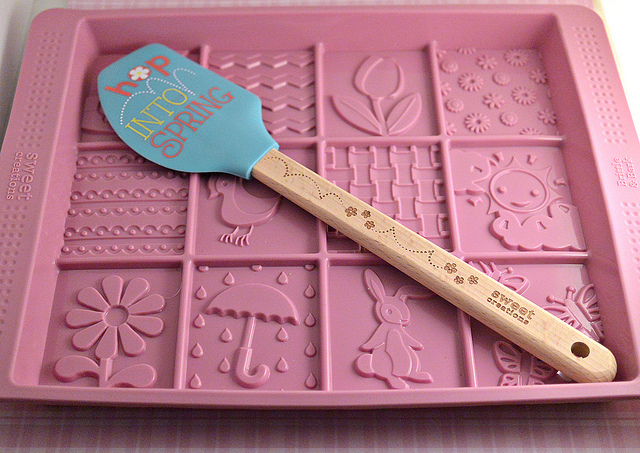
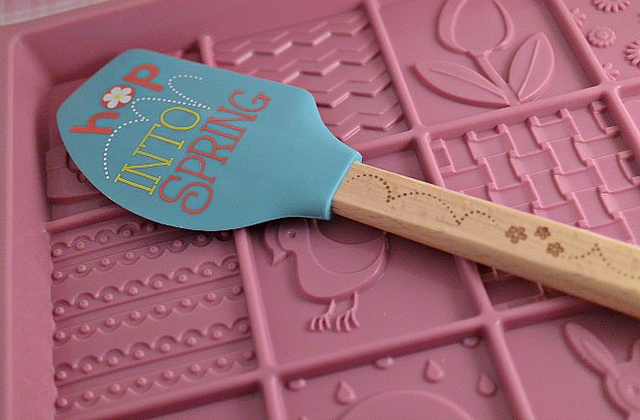
I think spring has FINALLY sprung here in North Texas! April ‘springs’ with events for us this year too. First our 20th wedding anniversary, then Easter, and then our daughter’s 18th birthday. And if there is anything in the world my husband and daughter can’t get enough of, it’s chocolate. So when Good Cook sent me their new Sweet Creations Spring Bark Mold and Hop Into Spring Spatula, I immediately had anniversary treats, Easter basket goodies and birthday sweets in mind…using chocolate of course!
It’s actually really easy to make these chocolate cookies and they look like gourmet store bought creations. I’m not going to lie, it’s time consuming and creates a lot of dishes to clean up, but they are so worth it when you see the smiles on the face of those receiving them and the accolades and “how did you do that?” statements  .
.
Homemade Spring Chocolate Covered Graham Crackers

clean, thin watercolor paintbrush
fondue pot (optional)
colored candy wafers and/or chocolate wafers
6 graham crackers, split in half along the break line so as to have 2 square crackers from each long one
Melt between a 12 to 18 of the colored wafers in a microwave safe bowl for one minute at 50% power. Stir. If the wafers are not at a consistency of a thick liquid then return to the microwave for 15 second increments at 50% power. If you are using a fondue pot, pour the melted candy wafers into it at this point and make sure the candle is lit/switch is turned on (for electric ones).
A fondue pot is not necessary but allows you to work at a more leisurely pace since the wafers will stay at the proper consistency without hardening up in the bowl while you work.

Whatever color of candy wafer you would like to show up in the design, ‘paint’ that color in the mold where you would like. Below is a photo showing you what I mean. Between each step let the previous color harden, the candy wafers harden pretty quickly without needing to do much to them, they should be set on the mold while you get your next color ready. If you are using real chocolate wafers you may need to freeze the mold while you prepare your next color in order for it to set. Repeat the above steps until you have all the colored wafers in the mold that you want.
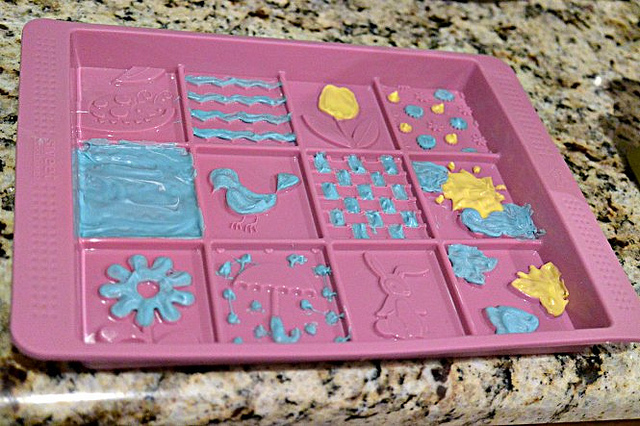
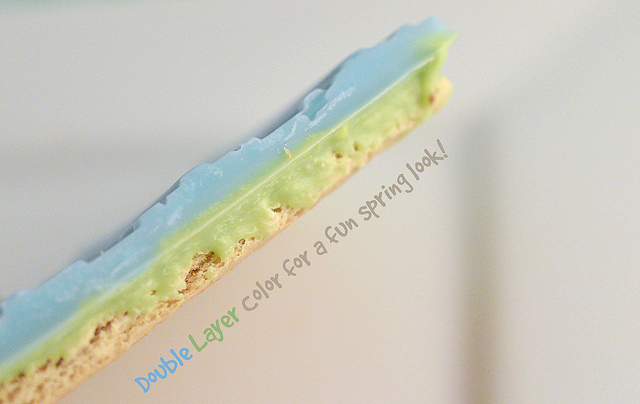
When you’re finished with your last color, you will melt the ‘surface’ wafers/chocolate for whatever color you would like (in our case it was the milk chocolate layer). You can set this layer up in the mold two ways, you can either melt it all at once and pour it on and then use a spatula to spread it evenly, or you can do it mold by mold, and melt more chocolate as you need it.
Place one of the squares of graham crackers on top of the final layer of melted chocolate. I suggest you do this section by section if you are using the candy wafers instead of the whole mold at once, as the wafers harden quicker than melted chocolate does, you will ensure a good adhesion to the cookie if you do it immediately after pouring the surface layer on. If you’re using real chocolate it won’t harden as quickly and you can do the whole mold if you prefer and then add the graham crackers.

Place the mold in the freezer for at least 30 minutes and the chocolate covered graham crackers should pop out nicely with just a twist along the mold lines.

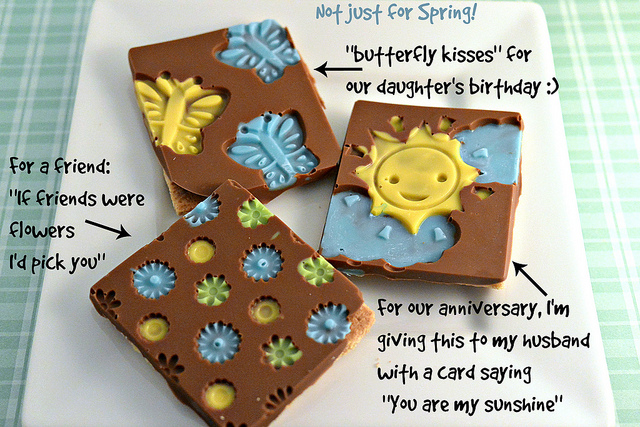

These are really sweet, as the molds are pretty deep. From the ingredients I used they have about 1.5 oz of chocolate/candy in each of them, so each cookie is about equivalent to a regular sized candy bar.
If you wish to order the Spring Bark Mold ($19.99) or any other items from www.goodcook.com, use code “SpringFling” to get 25% off your order. The Hop Into Spring Silicone Spatula is not currently available on their site, but the Sweet creations spring cookware tools line has other fun spring products too. You can follow Good Cook on Twitter also, to get the latest buzz on their products. Follow the hashtags #goodcookcom #goodcookkitchenexprt to find posts by other Good Cook Kitchen Experts easily.
 Tammy Litke is a Dallas blogger, blogging since 2008. She loves to watch movies, play video games, spend time in the kitchen, and travel. Between recipes and reviews you’ll find many helpful and some just plain funny posts on her blog. Welcome, pull up a chair and stay for a while!